


0
Educational aids
-
 TEACHING AIDS
 Laboratories of the Future – Polish project
 Active Whiteboard – Polish project
 INWESTYCJE W OŚWIACIE
 Learning in Ukrainian / Навчання українською мовою
 Physics for students from Ukraine / Фізика
 Chemistry for students from Ukraine / Хімія
 Biology for Ukrainian students / Біологія
 Mathematics for students from Ukraine / Математика
 Geography for Ukrainian students / Географія
 Polish language for students from Ukraine / Польська
 AKCJA-INTEGRACJA / ОПЕРАЦІЯ – ІНТЕГРАЦІЯ
 School Labs for: Physics - Biology - Geography - Chemistry
 Environmental Education
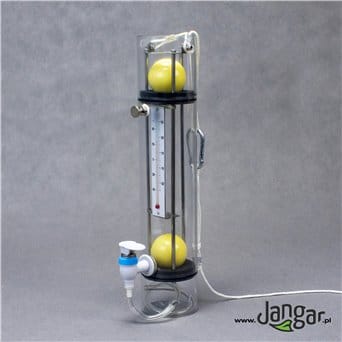
 Water, Soil, Air - Learning and Testing
 Microscopes, Slides, Optical instruments
 Biology
 Health Education
 Weather
 Geography, Earth Sciences
 Astronomy
 Physics
 Balances and Laboratory Equipment
 Chemistry
 Mathematics
 Interfaces and measuring sensors
 Digital School
 Educational Robots
 Coding
 Technology and Design
 School Experiments
 History
 Polish language
 Foreign languages
 Artistic Education / Art
 Pre-primary and early childhood education
 Personalized Learning
 Other equipment
 Physical Education (P.E.)
 Natural Sciences Laboratories
 Music
Music Social education
 Road Safety Education (RSE)
 Green Labs
 ECOLOGY: EDUCATION and RESEARCH
 Environmental Science Lab (EcoLab)
 Forest education / Trip to the forest
 Cognition and exploration of water, soil, air
 Waste, recycling, biodegradation
 Clean energy / environmental protection
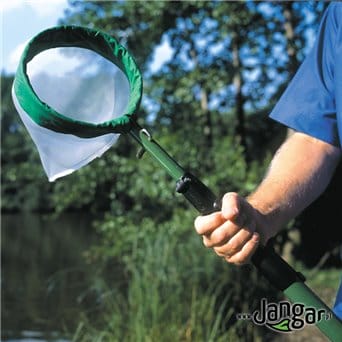
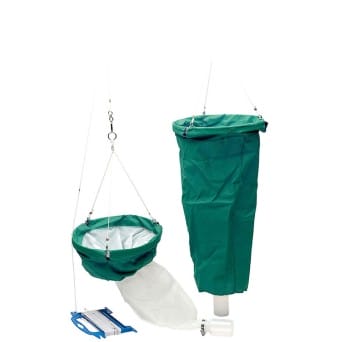
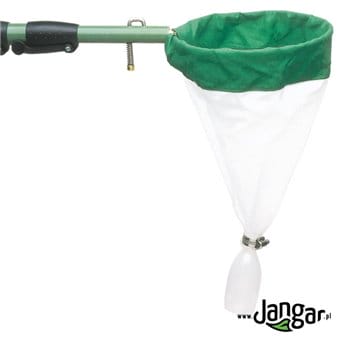
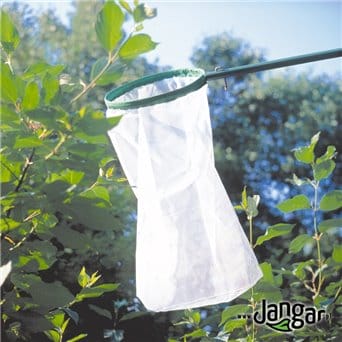
 Collection and fishing of specimens
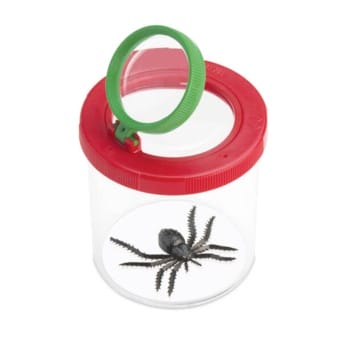
 Microscopes, cameras, preparations
 Other optical instruments
 Measuring instruments
 Field and optical instruments
 Weather / Weather conditions
 Natural specimens
 Test kits
 Earth science
 Models, demonstration aids
 Plates, maps, globes, folios
 Astronomy
 Multimedia (movies, programs, audio CD)
 Genetics / Cell
 Human biology
 Weights
 Laboratory equipment
 Equipment
 Young Naturefriend
 CHILDREN & FAMILIES, HOBBIES
 From Earth to the stars
 Natural research and observation
 Let's save our planet!
 Finger after finger
 The multimedia world of education
 21st century energy
 Magnetism, that is, let us attract ourselves
 The laws of physics and nature
 We measure and weigh
 Home Laboratory
 Mathematics - not as terrible as they paint it
 Large and small constructions
 Let's go!
 Young artists
 Foreign languages otherwise
 History and (Pre)history
 We take care of our health
 Collectors and enthusiasts
 Games and plays

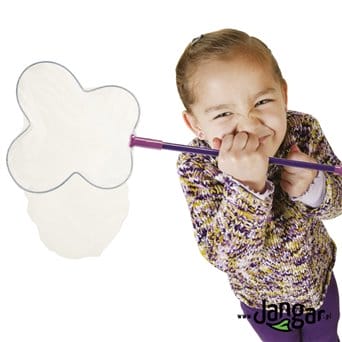
Testing water, soil, and air is crucial for understanding and monitoring the health of our environment. These tests provide valuable information about the quality, composition, and potential contaminants present in these vital resources. Here are the reasons why testing water, soil, and air is essential:
-
Water Testing: a. Human Health: Water is a fundamental resource for drinking, cooking, and hygiene. Testing water ensures its safety and prevents the risk of consuming harmful substances that can cause health problems. b. Environmental Protection: Water testing helps identify and monitor pollution sources, such as industrial discharges or agricultural runoff, which may harm aquatic ecosystems, wildlife, and plants. c. Compliance with Regulations: Regular water testing is necessary to comply with local, national, and international standards, ensuring the quality and safety of water supplies.
-
Soil Testing: a. Agricultural Productivity: Soil testing provides valuable information about nutrient levels, pH balance, and potential contaminants. This helps farmers optimize fertilization, improve crop yields, and prevent soil degradation. b. Environmental Management: Testing soil quality assists in identifying soil pollution, such as heavy metals or hazardous substances, ensuring proper remediation and preventing their spread to plants, groundwater, or other ecosystems. c. Land Use Planning: Soil testing supports land use decisions by assessing soil suitability for various purposes, including agriculture, construction, and ecosystem restoration.
-
Air Testing: a. Human Health: Air quality directly affects human health. Testing air helps identify pollutants such as particulate matter, volatile organic compounds (VOCs), or gases like carbon monoxide and ozone, which can cause respiratory problems and other health issues. b. Environmental Impact: Monitoring air quality enables the identification of pollution sources, such as industrial emissions or vehicle exhaust, and facilitates efforts to reduce emissions, protect ecosystems, and mitigate climate change. c. Regulatory Compliance: Regular air testing ensures compliance with air quality regulations and guidelines, which are designed to protect public health, reduce pollution, and promote sustainable development.
By testing water, soil, and air, we gain critical knowledge about the quality of these resources, detect potential contaminants, and take necessary actions to protect human health, ecosystems, and the environment as a whole. Regular testing and monitoring are essential components of sustainable resource management and the preservation of our planet for future generations.
SCHOOL
Sampling and testing are a reliable and modern form of teaching at school. Conclusions from self-research on previously collected samples, with the help of field instruments and kits, will certainly be more comprehensible for the student and easier to remember.
- On sale!
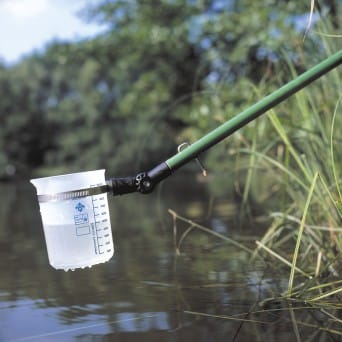
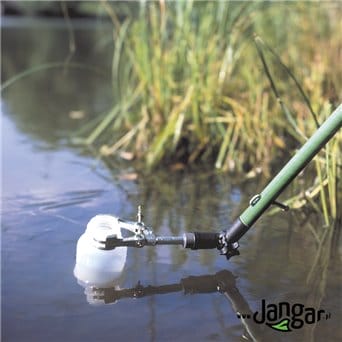
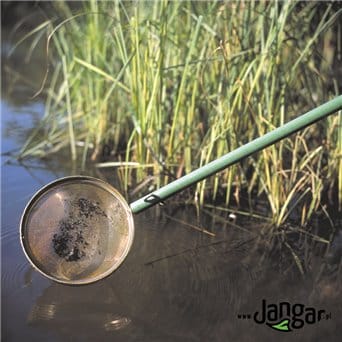

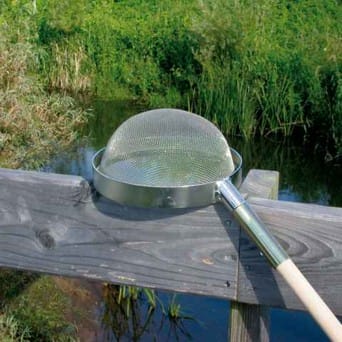

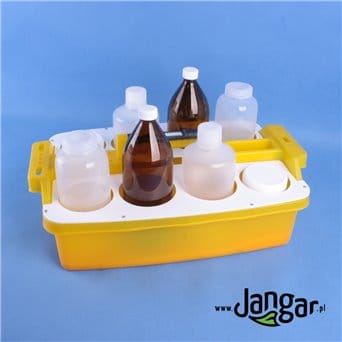
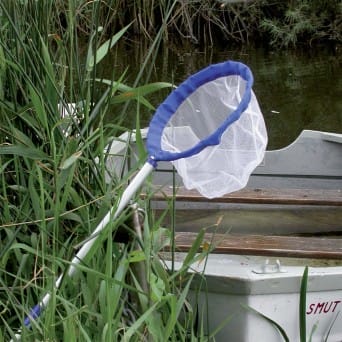
WATER
Proper sampling of water for further analysis requires adherence to specific procedures and the use of appropriate equipment. The selection of sampling devices and containers may vary depending on the water source, such as rivers, ponds, lakes, and the sea. Here is a description of the recommended methods and instruments for collecting water samples:
-
Rivers: a. Select a sampling location that represents the entire river flow, avoiding areas where water may be contaminated or influenced by local factors. b. Use water sampling devices such as water samplers or water sampling bottles with an extended opening. c. Place the sampler near the riverbed, minimizing disturbances caused by surface flow. d. Fill the container with water, ensuring minimal contact with hands or other objects that may contaminate the sample. e. Securely seal the container and label it with relevant information, including the date, time, and sampling location.
-
Ponds: a. Choose a location within the pond that represents the overall water quality, avoiding areas near the edges where water may be influenced by vegetation or human activities. b. Utilize a long-tube sampler or a water sampling bottle with an extended opening to collect the water sample from the center of the pond. c. Insert the sampler into the water at the desired depth, avoiding disturbances caused by surface movement. d. Fill the container with water, taking precautions to prevent contamination from hands or other objects. e. Seal the container tightly and label it with the necessary information for identification.
-
Lakes: a. Select a representative location within the lake, away from the shoreline where water quality may be influenced by human activities or vegetation. b. Employ a water sampling device, such as a water sampler or a water sampling bottle with an extended opening. c. Place the sampler near the lakebed to minimize disturbances from water movement. d. Fill the container with water, ensuring minimal contact with hands or other potential contaminants. e. Securely seal the container and label it with the relevant details.
-
Sea: a. Choose a coastal location that represents the area of interest, avoiding areas near the shore where water quality may be affected by human activities. b. Utilize specialized equipment for sampling seawater, such as a Low-Volume Sampler or Niskin bottle. c. Insert the sampler into the water, applying the appropriate depth and minimizing surface contact or disturbances caused by waves. d. Fill the container with seawater, taking care to avoid surface contaminants. e. Seal the container securely and label it with the necessary information.
Regardless of the water source, it is crucial to follow proper hygiene practices during sampling to avoid contamination. Always remember to label containers accurately and include essential details such as the date, time, and sampling location. This information is crucial for subsequent analysis and interpretation of results.
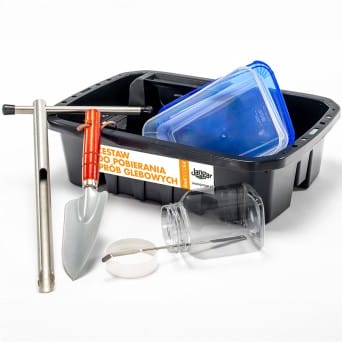
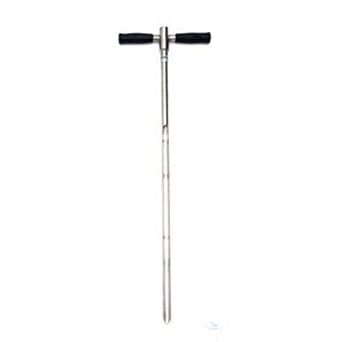
SOIL
Proper sampling of soil for further analysis requires following specific procedures and using suitable equipment. The selection of sampling devices and containers may vary depending on the purpose and location of soil to be tested. Here is a description of the recommended methods and instruments for collecting soil samples:
-
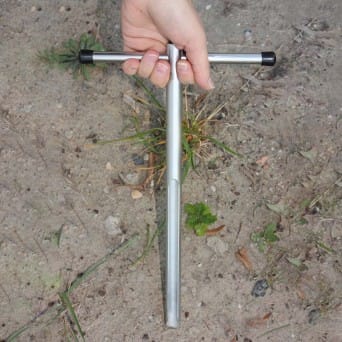
Soil Auger: a. Choose an appropriate soil auger based on the desired sampling depth and soil type. b. Insert the auger into the soil by twisting it clockwise, applying downward pressure to reach the desired depth. c. Gently twist and lift the auger to extract the soil sample, ensuring minimal disturbance to the surrounding soil. d. Transfer the collected sample into a clean container, avoiding contact with hands or other potential contaminants. e. Securely seal the container and label it with relevant information such as the sampling location, depth, and date.
-
Soil Tube Sampler: a. Select a suitable tube sampler based on the required sampling depth and soil conditions. b. Drive the tube sampler into the soil using a mallet or hammer, ensuring proper penetration to the desired depth. c. Once inserted, carefully extract the tube sampler, ensuring that the soil sample remains intact inside the tube. d. Seal the tube sampler with appropriate caps or stoppers to prevent sample loss or contamination. e. Label the tube sampler with necessary details, including the sampling location, depth, and date.
-
Soil Trowel or Shovel: a. Dig a small hole or trench using a soil trowel or shovel, ensuring it represents the area of interest. b. Collect a representative soil sample from the sidewalls and bottom of the hole, avoiding surface debris or stones. c. Place the collected soil sample into a clean container, minimizing contact with hands or other potential contaminants. d. Seal the container securely and label it with the relevant information for identification.
-
Soil Core Sampler: a. Choose an appropriate soil core sampler based on the desired sampling depth and soil characteristics. b. Insert the core sampler into the soil by twisting it clockwise, applying downward pressure to reach the desired depth. c. Rotate the sampler in the opposite direction to dislodge and collect a soil core sample. d. Carefully remove the core sampler from the soil, ensuring that the sample remains intact within the sampler. e. Transfer the soil core sample into a suitable container, securely seal it, and label it with necessary details.
Regardless of the sampling method used, it is essential to avoid cross-contamination between samples and ensure that the tools and containers are clean and free from any contaminants. Properly sealing and labeling the soil samples will help maintain their integrity for subsequent analysis.